Tips for Keeping Your Yard Wasp and Bee-Free This Summer
1. Remove Attractants
The first step in preventing wasps and bees from invading your yard is identifying and eliminating potential attractants. These include:
- Standing water: Make sure to eliminate any sources of standing water, such as birdbaths, clogged gutters, or containers that collect rainwater. Wasps are attracted to water sources for drinking and nesting materials.
- Food sources: Keep outdoor eating areas clean and free of food debris. Bees are attracted to sugary substances, so avoid leaving open soda cans or sweet snacks outside.
- Flowering plants: While bees are vital pollinators, too many flowering plants close to your home can attract large numbers of bees and wasps. Consider planting non-flowering plants or relocating some flowers further from high-traffic areas.
- Garbage and compost bins: Ensure that garbage cans and compost bins are tightly sealed to prevent attracting foraging insects seeking food scraps.
Wasp activity isn't random; it follows a predictable seasonal pattern. Read why you're seeing so many wasps around your house to understand the timing.
2. Seal Entry Points
Inspect your home and yard for potential entry points that could be used by wasps and bees to build nests. Seal cracks in walls, gaps in windows or doors, and any other openings that could provide access to your home or outdoor structures. Use caulk, weatherstripping, or mesh screens to block these entryways effectively.
3. Use Natural Repellents
Several natural ingredients can act as repellents for wasps and bees without harming them or the environment. Consider using these options:
- Peppermint oil: Mix peppermint essential oil with water in a spray bottle and apply it to areas where wasps and bees are active. The strong scent deters them from building nests.
- Citrus peels: Scatter citrus peels, such as lemon or orange, around your yard. The scent repels these insects and adds a pleasant fragrance to your outdoor space.
- Cucumber slices: Placing sliced cucumber in strategic locations can also help deter wasps and bees due to their dislike of the cucumber's scent.
How To Make DIY Wasp Spray
Making your own wasp repellent can be a cost-effective and natural way to protect yourself from bites while spending time outdoors. Here's a simple recipe for making a DIY stringing insect repellent using essential oils:
Ingredients:
- 2 ounces of witch hazel or vodka (acts as a carrier for the essential oils)
- 2 ounces of water
- 30-40 drops of essential oils (choose from citronella, eucalyptus, lemon eucalyptus, peppermint, lavender, tea tree, or a combination for a stronger repellent)
Instructions:
- Start by choosing your essential oils. Citronella, eucalyptus, and lemon eucalyptus are known for their effectiveness in repelling mosquitoes and other biting insects. Peppermint, lavender, and tea tree oils also have insect-repelling properties and can add a pleasant scent to your repellent.
- In a small spray bottle (4-ounce capacity), combine the witch hazel or vodka with the distilled water. The alcohol in witch hazel or vodka helps disperse the essential oils evenly and evaporates quickly when applied to the skin.
- Add 30-40 drops of your chosen essential oils to the bottle. You can adjust the number of drops based on your preference for scent and strength of the repellent. Shake the bottle well to mix the ingredients thoroughly.
- Store the DIY stringing insect repellent in a cool, dark place when not in use. Make sure to shake the bottle before each application to ensure the oils are well blended.
Usage:
- Before going outdoors, shake the bottle to mix the ingredients.
- Spray the repellent onto exposed skin, avoiding sensitive areas such as eyes, mouth, and open wounds.
- You can also apply the repellent to clothing, hats, and other outdoor gear to create a barrier against biting insects.
Additional Tips:
- Conduct a patch test before using the repellent on large areas of skin to check for any sensitivity or allergic reactions.
- Reapply the repellent every few hours or as needed, especially if you're sweating heavily or swimming.
- Keep the repellent away from children and pets, and avoid spraying it near food or drinks.
This DIY stringing insect repellent provides a natural alternative to commercial products containing synthetic chemicals. However, it's essential to remember that natural repellents may not be as long-lasting or potent as their synthetic counterparts, so reapplication is key for effective protection.
For targeted control of wasps and bees, consider installing traps designed specifically for these insects. Commercial traps are available that use attractants to lure them in and trap them without using harmful chemicals. Place these traps away from high-traffic areas but near potential nesting sites for optimal effectiveness.
How To Make A DIY Wasp Trap
Creating a DIY wasp trap is a straightforward and cost-effective way to control wasps around your home and outdoor spaces. Here's a step-by-step guide to making a simple and effective homemade wasp trap using materials commonly found around the house:
Materials Needed:
- Plastic bottle (2-liter soda bottles work well)
- Sharp utility knife or scissors
- Sweet bait (sugar water, fruit juice, soda, or a mixture of sugar and water)
- Dish soap
- String or wire for hanging (optional)
Instructions:
- Prepare the Bottle: Begin by cleaning and drying the plastic bottle thoroughly to remove any residue or odors that may deter wasps. Using a sharp utility knife or scissors, carefully cut the top third of the bottle off. This portion will serve as the funnel for trapping the wasps.
- Create the Funnel: Take the top portion of the bottle (the part with the cap) and remove the cap. Invert the top portion and insert it into the remaining bottom part of the bottle, creating a funnel-like structure. Ensure that the narrow end of the funnel points downward into the bottle.
- Add Bait: Pour your chosen sweet bait into the bottom of the bottle. Sugar water, fruit juice, or soda works well as attractants for wasps. Add a few drops of dish soap to the bait. The soap helps break the surface tension of the liquid, making it easier for the wasps to drown.
- Secure the Trap: If desired, you can punch holes near the top of the bottle and thread string or wire through them to create a hanger for the trap. This allows you to hang the trap in areas where wasps are active. Alternatively, you can place the trap on a flat surface near wasp activity, such as a patio or garden.
- Deploy the Trap: Place the DIY wasp trap in areas where you've observed high wasp activity or near potential nesting sites. Wasps are attracted to sweet scents, so positioning the trap strategically is crucial. Check the trap regularly and refill the bait as needed. Empty the trap and replace the bait mixture every few days to maintain its effectiveness.
- Dispose of Trapped Wasps: Once the trap has caught wasps, you can dispose of them safely. Remove the funnel portion of the trap and empty the contents into a bag or trash bin. Clean the trap with soapy water before refilling it with fresh bait.
Safety Precautions:
- When handling the DIY wasp trap or disposing of trapped wasps, wear gloves and exercise caution to avoid stings.
- Keep the trap out of reach of children and pets to prevent accidental contact with the bait or trapped insects.
By following these steps, you can create a homemade wasp trap that effectively attracts and captures wasps, helping to reduce their population in your outdoor areas. Regular monitoring and maintenance of the trap will ensure continued success in controlling wasps around your home.
6. Maintain Your Yard Regularly
Regular yard maintenance plays a crucial role in preventing wasps and bees from establishing nests. Keep grass and vegetation trimmed, remove debris and clutter, and inspect outdoor structures regularly for signs of nesting activity. Promptly remove any nests you find to discourage further infestation.
7. Seek Professional Help
If you're dealing with a severe infestation or have concerns about stinging insects on your property, don't hesitate to seek professional help. Pest control experts can assess the situation, implement targeted solutions, and provide ongoing monitoring to ensure your yard remains wasp and bee-free.
Call Our Team Of Exterminators
If you are looking for effective stinging insect control in Nebraska or Iowa, look no further than Midwest Pest Control. Our team of experienced pest exterminators can provide a comprehensive yard inspection, targeted treatments, and helpful insights to ensure your yard stays free of wasps and bees all summer long. Contact us today to get started!
Most Common Types of Wasps and Bees
- Stinging insects are a diverse group that includes bees, wasps, hornets, and ants. Each species has its own unique characteristics and behavior patterns. Here are some of the most common types of stinging insects:
- Honey Bees (Apis mellifera):
- Honey bees are well-known for their role in pollination and honey production. They are typically yellow and black in color, with a fuzzy appearance.
- Honey bees are social insects that live in colonies consisting of a queen, workers, and drones. They build their nests in hollow trees, beehives, or man-made structures.
- Honey bees are not aggressive unless provoked or defending their hive. Their stings are barbed, and when a honey bee stings, it leaves its stinger and venom sac behind, which can result in the bee's death.
- Bumblebees (Bombus spp.):
- Bumblebees are larger and rounder than honey bees, with a furry appearance and varying colors such as black, yellow, and orange.
- They are also important pollinators and live in small colonies. Bumblebee nests are typically found in underground burrows, abandoned rodent nests, or other sheltered locations.
- Bumblebees are generally docile but may sting if threatened or disturbed. Unlike honey bees, their stingers are not barbed, allowing them to sting multiple times without harm to themselves.
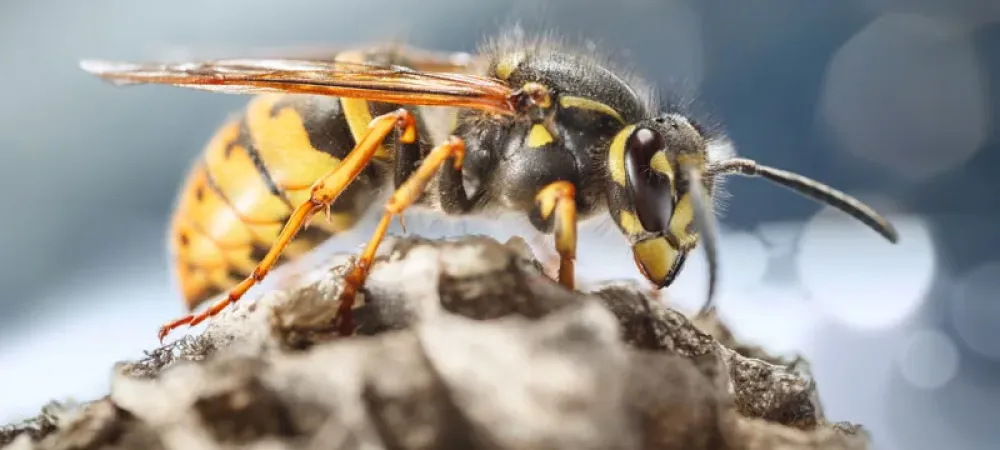
- Yellow Jackets (Vespula spp. and Dolichovespula spp.):
- Yellowjackets are predatory wasps known for their yellow and black striped bodies. They are social insects that build paper-like nests in underground burrows, wall voids, or aerial locations such as trees or eaves.
- Yellowjackets are aggressive defenders of their nests and can sting repeatedly. Their stings are painful and can cause allergic reactions in sensitive individuals.
- These wasps are scavengers and are often attracted to sugary foods, meats, and other human food sources, making them common pests at outdoor gatherings.
- Paper Wasps (Polistes spp.):
- Paper wasps are slender with long legs and narrow waists. They have brownish bodies with yellow or reddish markings.
- These wasps build open, umbrella-shaped nests made of paper-like material, which they attach to eaves, branches, or other structures.
- Paper wasps are less aggressive than yellowjackets but will defend their nests if threatened. Their stings can be painful but typically do not pose a significant threat to humans unless provoked.
- Hornets (Vespa spp.):
- Hornets are larger and more robust than other wasps, with distinctive black and white markings. They build large, enclosed nests made of paper-like material, often in trees or shrubs.
- Hornets can be aggressive when defending their nests and have powerful stings that can cause intense pain and allergic reactions in some individuals.
- The most well-known hornet species is the Asian giant hornet (Vespa mandarinia), which has gained attention for its size and potentially harmful sting.
- It's important to be cautious around stinging insects and to take preventive measures to avoid encounters, especially if you have allergies to insect stings. If dealing with a significant infestation or nest near your home, it's recommended to seek professional assistance for safe and effective removal.
How To Remove Wasp Nests
- Removing wasp nests can be a challenging task, especially if you're dealing with a large or aggressive colony. It's crucial to approach nest removal with caution to avoid getting stung. Here are step-by-step instructions for safely removing wasp nests:
- Assess the Situation: Before attempting to remove a wasp nest, evaluate its size, location, and the type of wasps present. Small nests and those located in easily accessible areas may be manageable for DIY removal, while larger nests or nests in challenging locations may require professional assistance.
- Choose the Right Time: Plan to remove the nest during early morning or late evening when the majority of the wasps are inside the nest and less active. Wasps are more aggressive during the day when they are foraging for food.
- Gather Safety Equipment: Wear protective clothing, including long sleeves, pants, gloves, and a face mask or goggles to shield yourself from stings and potential allergens. Use a head covering or beekeeper's hat with a veil for additional protection, especially if dealing with a large nest, to avoid painful stings.
- Prepare Removal Tools: Have a can of commercial wasp and hornet spray or a homemade solution (dish soap and water mixture) ready for use. Make sure the spray can reach the nest from a safe distance.
- Approach the Nest: Slowly and carefully approach the nest, keeping a safe distance to avoid disturbing the wasps. If using a spray, aim it directly at the nest entrance or openings. Follow the instructions on the spray can for application and safety precautions. Wait for the recommended amount of time specified on the spray can to ensure the wasps inside the nest are effectively eliminated.
- Remove the Nest: Once you're confident that the wasps inside the nest are no longer active or a threat, cautiously approach the nest for removal. Use a long-handled tool (such as a broomstick) to knock down the nest from its attachment point. Avoid using bare hands or getting too close to the nest. Carefully place the nest in a sealed plastic bag or container to prevent any remaining wasps from escaping.
- Dispose of the Nest: Seal the bag or container containing the nest securely. Double-bag the nest if possible to prevent leaks or accidental openings. Dispose of the bagged nest in an outdoor trash bin or designated waste disposal area. Do not leave the nest where children, pets, or wildlife could access it.
- Monitor for Activity: After removing the nest, monitor the area for any remaining wasps or signs of new nest construction. Be prepared to repeat the removal process if necessary.
- Consider Professional Help: If you're unsure about removing the nest safely or if dealing with a large or aggressive colony, it's best to seek professional pest control services. They have the expertise and equipment to handle wasp nest removal efficiently and safely.
- It's essential to exercise caution and prioritize safety when removing wasp nests. If you have allergies to insect stings or are uncomfortable with DIY removal, it's always wise to seek professional assistance to avoid potential risks.
Do Fake Wasp Nests Work?
Fake wasp nests can act as a deterrent for some territorial wasp species, such as paper wasps. However, their effectiveness varies, and they may not deter all types of wasps. Factors like location, timing, and the realism of the fake nests play a role. While they can be part of a comprehensive strategy, relying solely on fake nests may not provide guaranteed protection against all wasp infestations. It's advisable to combine their use with other preventive measures and seek professional assistance for significant wasp problems.